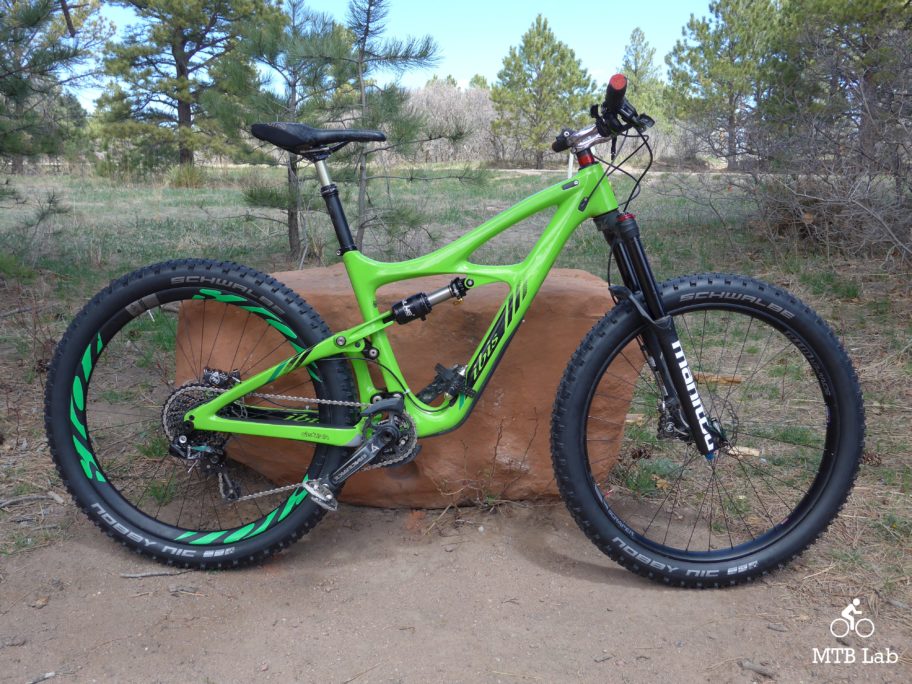
Ibis Mojo HD3 with Boost/Plus setup
Earlier this year Ibis released an upgraded Mojo HD3 that had the capabilities of running tires from 2.3-inch to Plus sized 2.8-inch. This potential comes as a result of an all-new swingarm design for the HD3 that is now both Boost and Plus tire compatible so that the rear end can accommodate fatter Plus tires up to 2.8 inches in width.
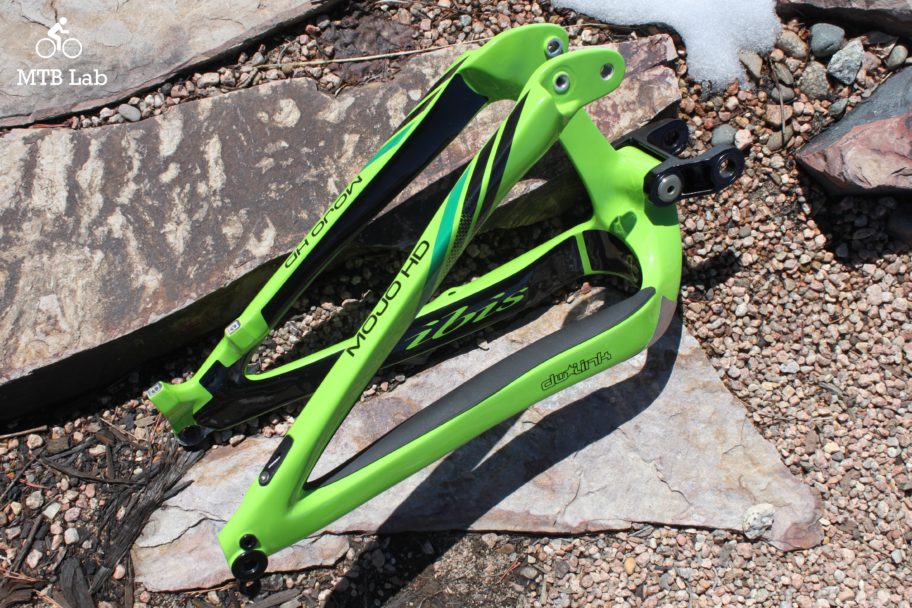
HD3 Boost/Plus Swingarm
They’re also offering a swingarm retrofit kit for the original 142mm HD3’s to convert them to the Boost/Plus system. The $899 kit includes the HD3 Boost/Plus Swingarm, an aluminum 148mm Hexle thru axle, a Boost lower link with accompanying rear shaft hardware and a Boost compatible front derailleur mount.
I have been running my older version of the HD3 with a Manitou Magnum 27.5+ fork and Plus sized wheel and tire up front for over six months now, and I love the fantastic traction, braking, and float that the semi-fat platform provides. Although I can run 2.5-inch tires on their 741 rims in the rear, I desired the extra bit of girth that a 2.8-inch wide tire provides, and the new swingarm design brings that to fruition. I ordered the HD3 Boost/Plus swingarm retrofit kit for my Green Machine HD3 and set about getting everything installed and setup.
Installation and Set Up
I wanted to build up an upgraded rear wheelset using my existing Ibis 741 carbon rims and an Onyx Boost specific hub due to its innovative Sprag Clutch, which offers instant engagement, but unfortunately, its inherent cost was prohibitive with my current budgetary constraints.
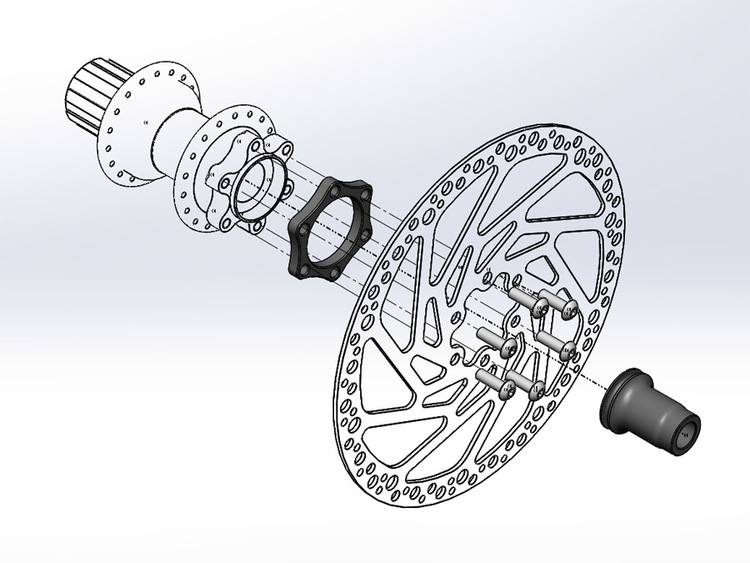
Lindarets Boostinator Kit – Diagram
Instead, I went with the $40 Boostinator kit from Lindarets, which modifies your existing rear wheel to be Boost compatible. The kit includes a specially-designed axle end cap and a precision-machined rotor spacer with a set of six high-strength Class 10.9 bolts. It requires a slight re-dishing of your wheel, so I let my expert wheel builder Chris Murray of Elevation Wheel Company do his magic for the new setup. Once everything is done the disc and drivetrain positions and spoke bracing angles are maintained for the Boost specifications.
Boostinator Steps:
- Remove existing rotor bolts and rotor.
- Remove existing disc side end cap from the hub.
- Push Boostinator end cap onto disc-side.
- Add rotor with Boostinator spacer and finger tighten all the Boostinator 10.9 bolts (apply one drop of thread locking compound to leading end).
- Use a Torque wrench to tighten Boostinator bolts to 5Nm in the following pattern: 12:00 -> 6:00 -> 4:00 -> 10:00 -> 2:00 -> 8:00
- Re-Dish Wheel
- Loosen drive-side and tightening disc side spokes 1/4-turn per pass.
- Most wheels require less than 1/2-turn loosening on drive-side spokes, and less than one turn added to disc side spokes.
- De-tension and true wheel as needed.
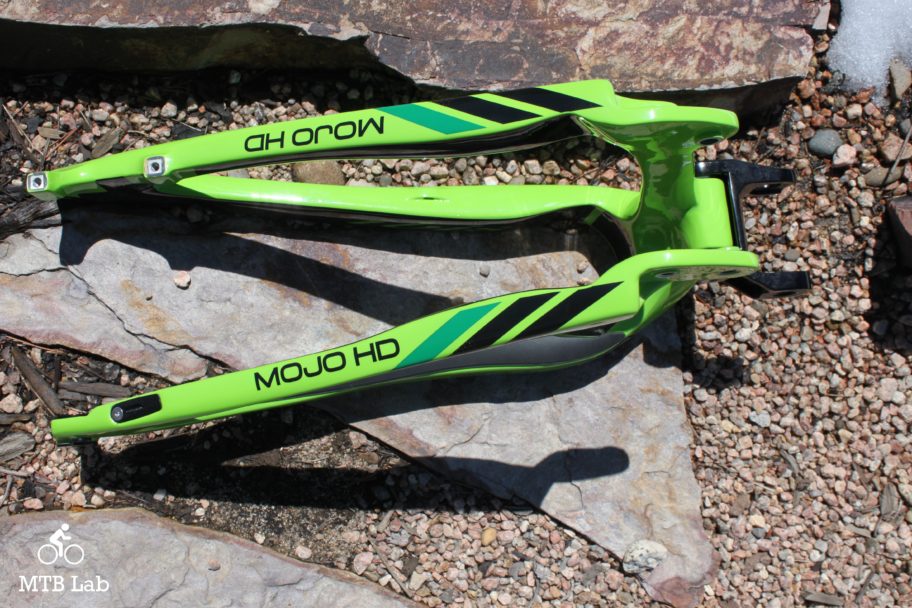
HD3 Boost/Plus Swingarm – lots of clearance for smaller Plus sized tires
I tore down most of the rear end of the bike to make it easier to install and set up the retrofit kit.
Tear down steps: (click to unhide)
- Remove wheels
- Rear Derailleur
- Remove the chain
- Disconnect the derailleur cable and remove derailleur
- Pull out the internally routed housing and unscrew the drilled out cable ports and clip off the cable ties
- Rear Brake
- Disconnect rear brake
- Clip off hydraulic hose cable ties
- Crank/BB
- Remove crankset
- Remove bottom bracket and ISCG 05 chain guard system
- Links
- Remove forward pivot shaft and nut on lower link, save the nut for retrofit kit build
- Deflate rear shock
- Remove clevis rear shock bolt/nut, clevis bolts on swingarm, and clevis, save bolts and nuts and clevis for retrofit kit build
- Remove upper link bolts on seat tube, save bolts for retrofit kit build
- Remove upper link bolts on swingarm (awkward bolt removal due to the tight quarters), save bolts and upper link for retrofit kit build
I took this opportunity to add protection tape to the new rear swingarm and replaced worn out tape on the main frame. Other than the retrofit kit and Boostinator, the only thing I replaced was the bottom bracket, since the old bearings were toast.
Rebuild steps: (click to unhide)
- Links
- Install the upper link with its bolts onto the new swingarm – tighten to spec
- Install the upper link with its bolts onto the seat tube – tighten to spec
- Install the clevis to the swingarm with its bolts and then the clevis shock bolt and nut to the rear shock – tighten to spec
- Remove the pivot shaft from the swingarms lower link, push the lower link into place on its seattube location
- Insert the new pivot shaft into the lower link and tighten down to spec using the original pivot shaft nut
- Crank/BB
- Install bottom bracket and ISCG 05 chain guard system – tighten to spec
- Install crankset and tighten to spec
- Rear Brake
- Install the rear brake to post mount
- Cable tie the hydraulic hose
- Rear Derailleur
- Install the internally routed housing using the drilled out cable ports and cable tie things down
- Install the derailleur
- Route and connect the derailleur cable
- Install chain
- Install wheels
Tuning:
- H-
screw or high gear limit stop – had to move the limit inward - L-screw or low gear limit stop – had to move the limit inward
- Tune derailleur shifting – nothing substantial other than some minor tweaking
- No chainline issues
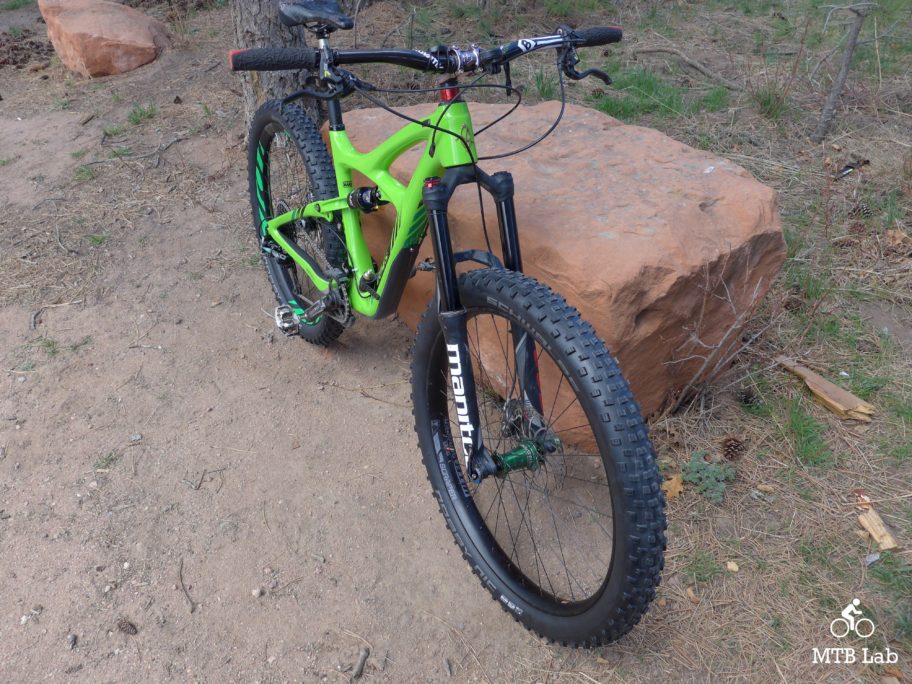
Ibis Mojo HD3 with Boost/Plus
HD3 Set up
- Drivetrain – SRAM 10-42t cassette, SRAM X.0 derailleur and shifter, and Race Face Turbine Cinch crank with DM 30t chainring
- Brakes – Magura MT7 with 180mm Storm SL rotors
- Suspension – Manitou Magnum Pro 27.5+ fork and DBInline shock
- Wheels – Rear: DT Swiss hub and Ibis 741 40mm carbon rims, Front: Industry Nine Boost hub and WTB Scraper 45mm rim
- Controls – KS Integra dropper post, SMC4 Sport Gel saddle, Jerome Clementz BlackBox carbon bar with Clydesdale PadLock grips, and Level Nine AM Team stem
First Impressions
I ended up choosing the Schwalbe Nobby Nic TrailStar 27.5 x 2.8″ tire for the rear and the Nobby Nic TrailStar 27.5″ x 3.0″ for the front since I like the tread pattern and traction and braking characteristics of that model. I have had the bike in a variety of terrain and conditions, including snow, light mud, and bone dryness. It’s been on hardpacked trails, rock gardens, roots and rock slabs, so they have gotten a good taste of the usual Colorado trail blend, though I didn’t get to try them in any rain storms.
I am still working out getting the tire pressure correct for my riding, and I have found that just a few psi alterations can make a substantial difference in how the tires and bike reacts. After some experimentation, I settled in at 16 psi for my 165 lbs body weight and riding style, though I am by no means done with that process. UPDATE: After conferring with Scot at Ibis he suggested I drop the pressure just a bit for my weight, so I am now running 14psi/2.8″ and 13psi/3.0″, and it improved traction, plushness, and pliability.
I have also been tweaking the rear shock and front fork to get the best performance, and response from the suspension since the bigger tires tend to bounce and react differently when hitting things and during steering and cornering. An extra dollop of Rebound to the shock and fork seems to help with things.
The Plus tires footprint and float characteristics and low pressure offer massive amounts of traction and control along with some mild suspension, and you can apply more torque to the handlebars and increase your body English leverage to the bike in general. I noticed that sometimes during steering or while performing technical maneuvers the bike seemed to react a fraction slower, and I’d have to track stand or give it more time to roll through things, so it took some riding time to become tuned to that sensation.
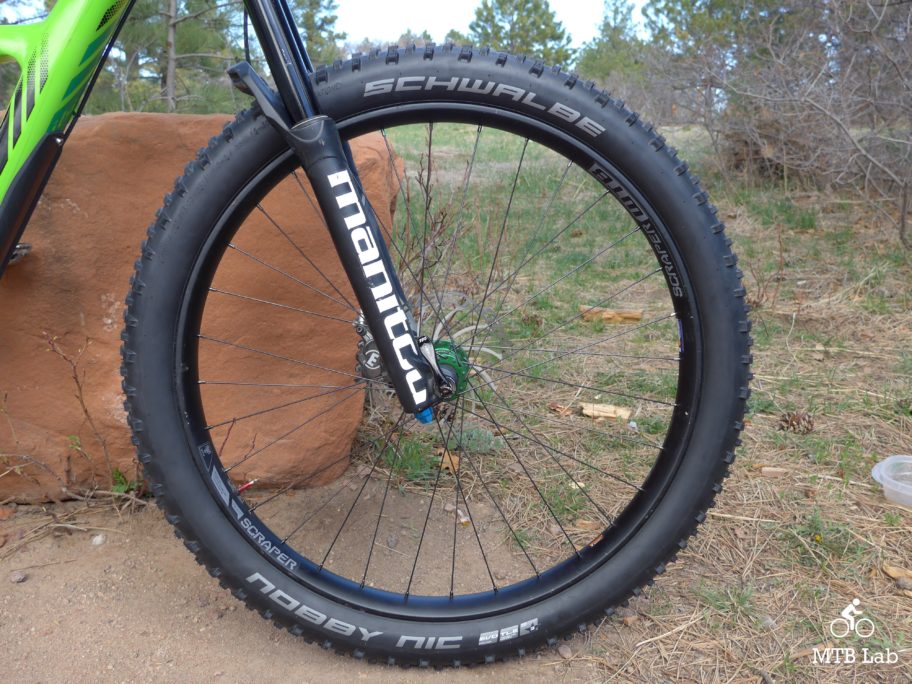
Nobby Nic Trailstar 3.0″ Plus sized tire
On occasion, you do pay the price for those big tires, as they can feel somewhat ponderous on fire roads and long slow climbs. As soon as things get even the slightest bit gnarly or rugged, the tire size issue becomes irrelevant. They roll pretty well for big fat tires and do much better than anything in the real fat tire 4″ to 4.8″ territory, and they can accelerate if you apply the pedal to the metal, though I’d be hard pressed to call them snappy.
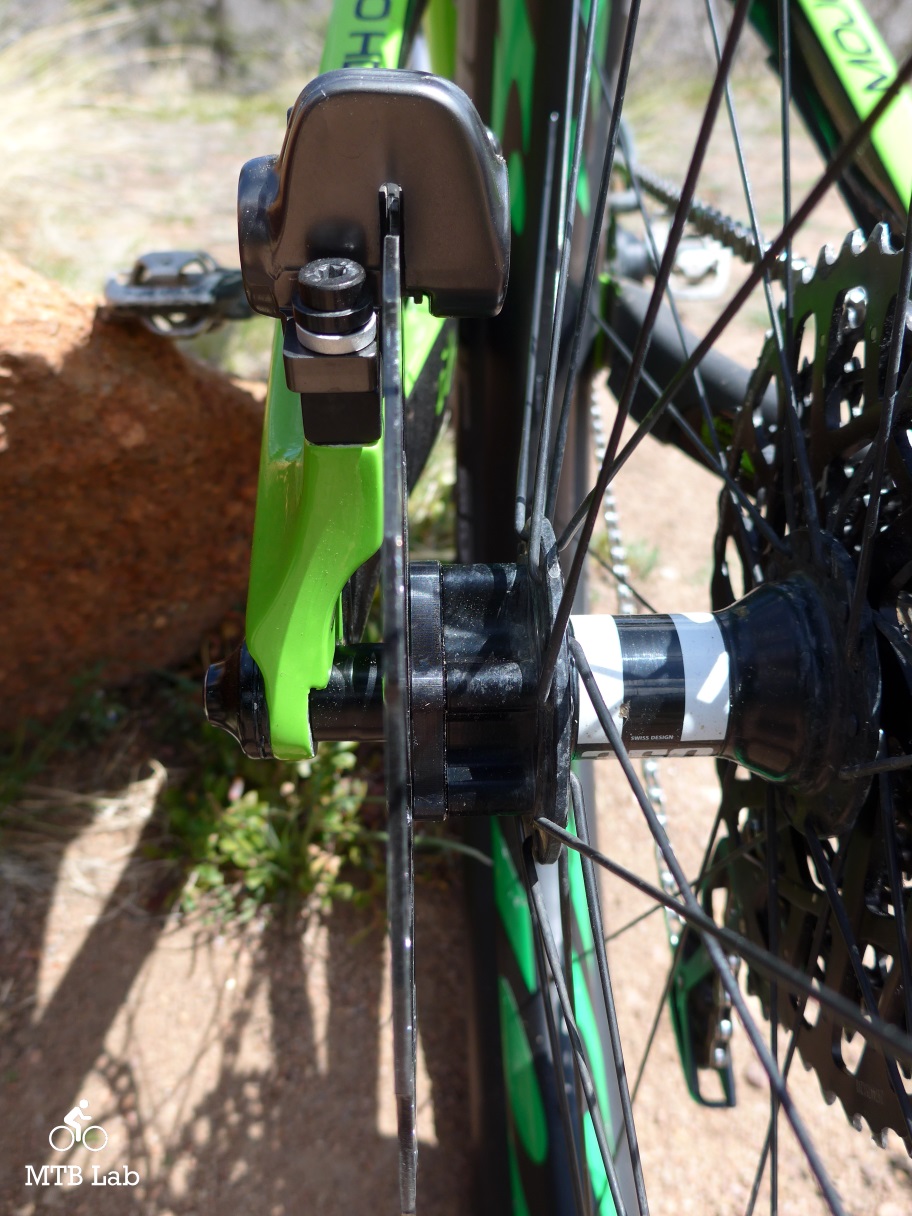
Boostinator kit from Lindarets – showing the rotor spacer and axle end cap
Once you turn the bike into downhill mode, the entire thing comes alive, and the Plus sized tires rule, offering prodigious amounts of traction and braking control and they float over the chunder. Rocky and rough terrain elements are softened by the Plus width and they never felt too squishy, bouncy or overwhelming. They rolled well into berms and corners, and I didn’t feel any abrupt or uncontrollable washouts, even when pushing them hard. Some of my local trails are abundant with deep loose gravel and the tire performed admirably, offering good containment and even when the tire wandered around in the slop, you could hold them on their line without losing the front end. In the little bit of mud, they got to play in, the float and footprint kept them from squirming around, offering up a sense of complacency in a usually unfriendly environment.
The Lindarets Boostinator system has worked fine, in fact, I haven’t noticed it at all, and it certainly saved me a lot of money over rebuilding or buying a Boost specific rear wheel. During the initial derailleur tuning, I had to make some relatively significant inward alterations of the cages pulley positioning using the high and low limits stops, though not sure why? I haven’t had any issues with the new chainline and didn’t need to adjust bottom bracket spacers or the chainring.
The new swingarm offers plenty of clearance for the Nobby Nic 2.8″ tires, and I don’t think they’ll be much scraping issues within the yoke if mud gets packed onto the tire and flung around. I wasn’t able to jam the 3.0″ Nobby Nic into the back which I knew would be the case since that is outside the swingarms design specification. When I first installed the Nobby Nics onto their respective rims, they measured on the skinnier side of things, but after sitting around for a couple of days, they swelled out and came in at a respectable 2.75″ for the 2.8 and 2.95″ for the 3.0 models. The wider WTB Scraper rims pushed out the tires carcass to match up with the knob width.
I have been happy with the Plus sized Nobby Nic tires so far, and they’re sticky, pliable, tough and offered excellent float and traction control.
Nobby Nic Measured Specs
- 2.8″ on Ibis 741 40mm rims @ 16 psi
- 920 grams
- Knob – 2.75″
- Carcass – 2.67″
- 2.8″ on WTB Scraper 45mm rims @ 16 psi
- 925 grams
- Knobs – 2.95″
- Carcass – 2.94″
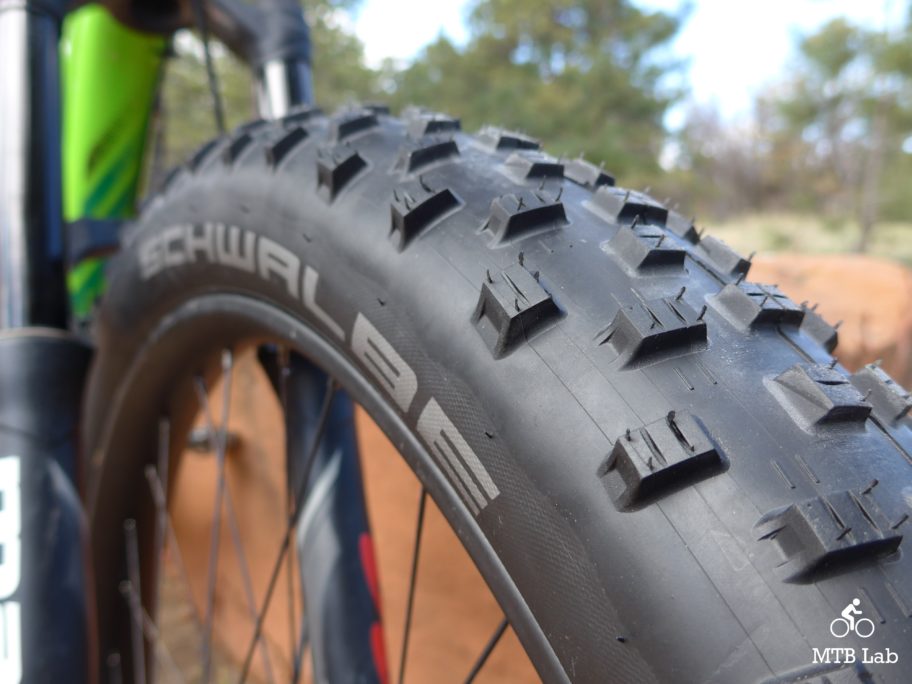
Nobby Nic Trailstar 3.0″ Profile
Bottom Line
The HD3 swingarm retrofit kit ($899) has worked been exceedingly well and offers up the same Plus/Boost capabilities of the latest HD3 frame iteration. It was a relatively straightforward operation, though perhaps time consuming to tear down the original 142mm based setup and rebuild the bike with the new swingarm retrofit kit. Instead of buying or building a new Boost rear wheel for the project, I bought the Lindarets Boostinator kit ($40) which modifies your existing 142mm rear wheel to be Boost compatible, with the proper disc and drivetrain positions and spoke bracing angles.
The Nobby Nic Trailstar 2.8″ and 3.0″ Plus sized tires ($90) have been a great all around tire, and their construction, sidewall protection, compounds, tread design and big beefy knobs offer great adhesion, pliability, float and traction properties for improved control, steering, braking and cornering characteristics. They’re more than an upsized base Nobby Nic and are a specifically designed Plus tire and offer all the highly desired Plus capabilities.
The Plus tires offer up gobs of Velcro traction and braking along with superb float and a useful footprint, especially in loose and muddy conditions. Anytime the terrain gets rugged, or they’re going downhill the Plus tires rule, giving excellent control and float over the chunder and softening trail irregularities. They aren’t their best on fire roads or smooth trails and can feel a bit ponderous and sometimes can react a bit slow when steering and on technical maneuvers, but it’s easy to roll through things and get used to the slight delay.
For further information refer to:


{ 0 comments… add one now }