

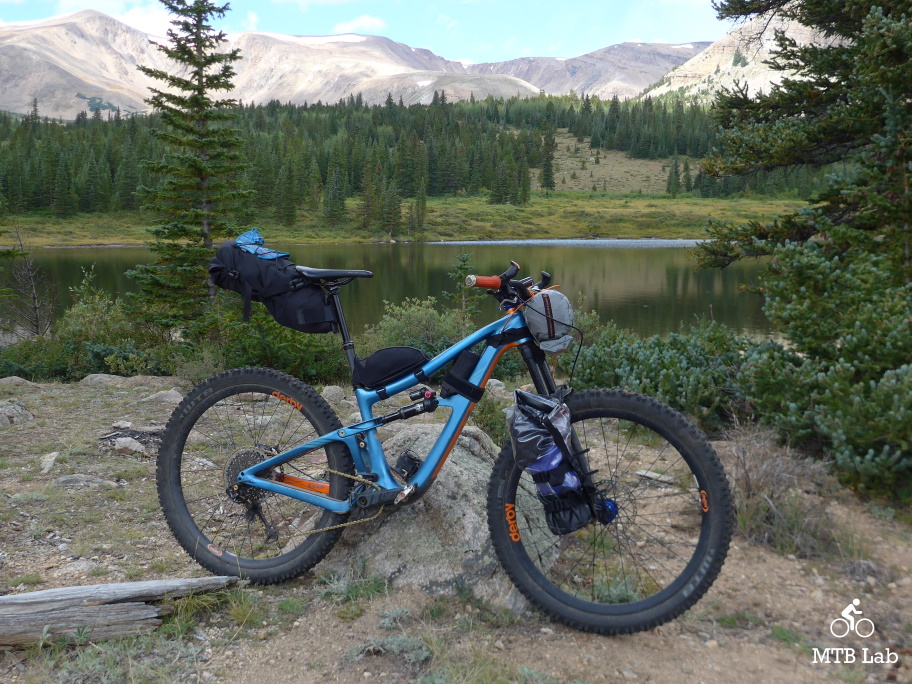
The Topeak BackLoader is a large capacity seat bag specially designed for bikepackers providing a streamlined way to carry gear without the need for a rear rack. Constructed of lightweight, highly water-resistant and durable materials, it mounts and removes quickly. The upgraded saddle mount system, in conjunction with compression straps, reduces the pendulum effect associated with large rear payloads, providing a comfortable ride for those long miles. An easy-access waterproof inner bag is included to keep contents completely dry. It comes in 6L and 10L sizes for $74.95 and $84.95.
For further information, refer to topeak.com.
Mounting
Mounting the pack onto the bike is relatively simple, with one wide Velcro strap that goes around the seatpost and two buckles that pass through the saddle rails.
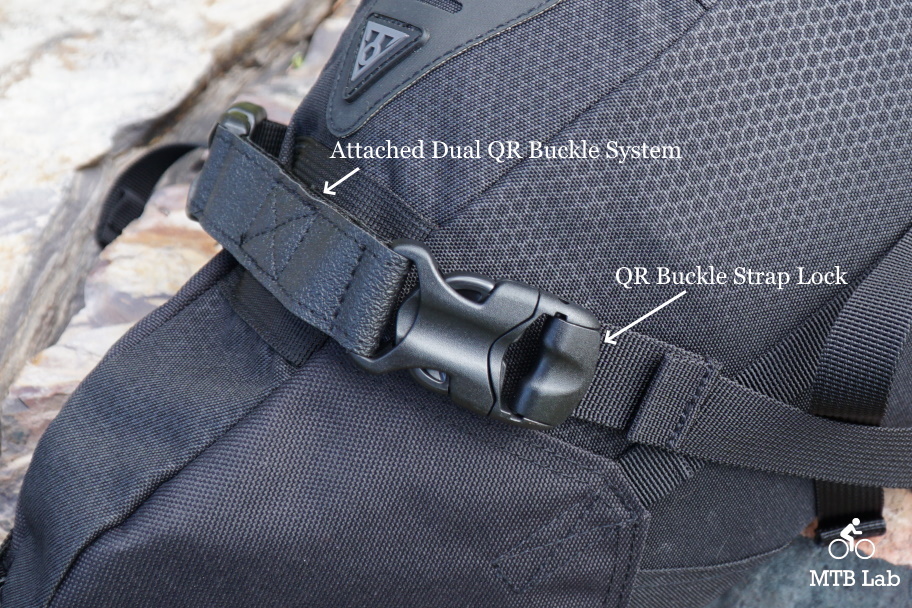
There is a dual QR buckle system tacked onto the front top to attach the pack to the saddle. You’ll need to finagle the buckle ends from the inside of the saddle, up and over the rails. This procedure can be somewhat problematic, depending on how much room is under the saddle. Turning the bag perpendicular to the saddle made it slightly easier to get the buckles over the rails.
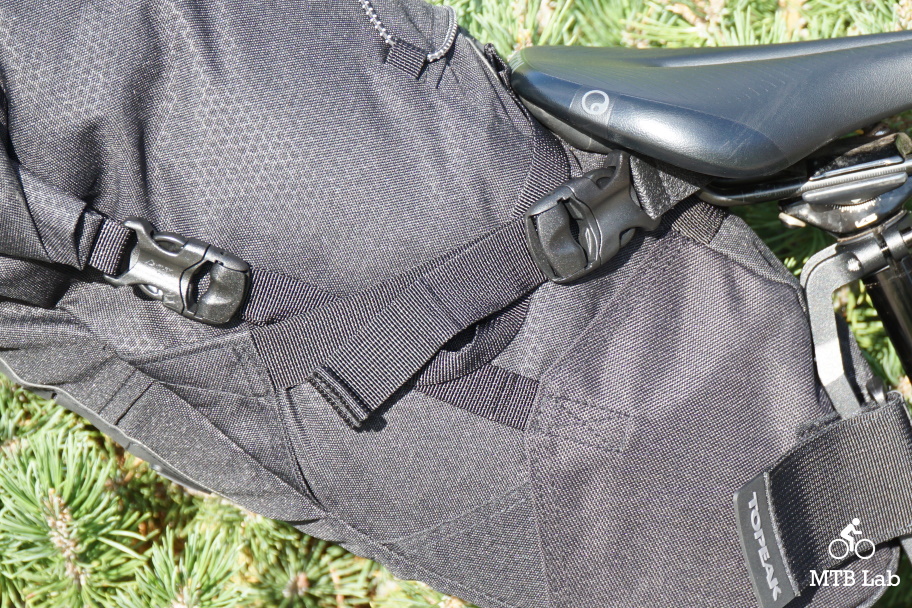
Once the buckle is up and over the saddle rail, you can loosely snap it into the diaper cradle strap buckle to get the pack attached to the bike, though you may need to unclip the buckle lock for some slack in the system. I think a bit more length of the top strap would make it easier to both get the strap routed over the rails and clipped into the cradle buckles. Once I was on a trip, I left the pack on the bike, so it was only an issue when reinstalling things. The dual-buckle system utilizes a soft and pliable covering to help protect the saddle’s rails.
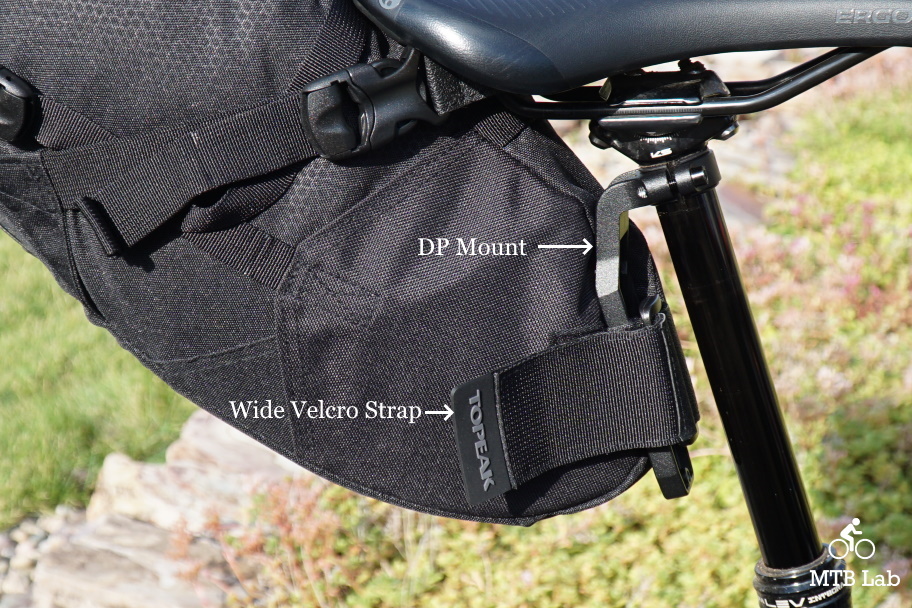
Since I was using a mountain bike with a dropper post, I installed their DP Mount, which is an aluminum L-shaped bracket that places the seatpost attachment point away from stanchions to help retain the posts telescoping functionality. Once the DP Mount was properly clamped onto the post, you wrap the wide Velcro strap around its body and pull it securely tight. The inside of the Velcro strap system has a soft, pliable and grippy section, to help with excessive pack movement and protect the seatpost.
Packing
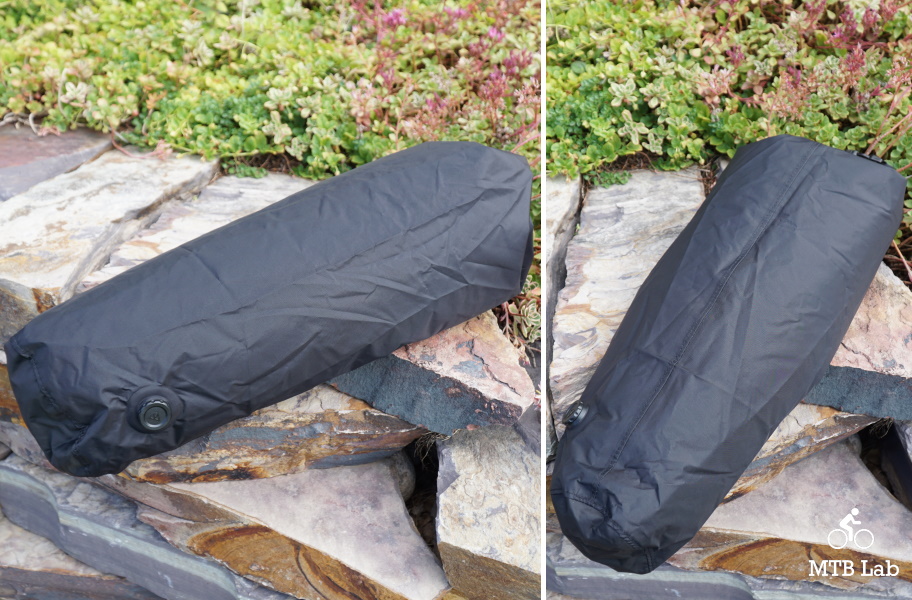
The main pack body itself isn’t waterproof, though it does utilize a water-resistant and relatively robust and durable material for longevity. To protect the contents of the pack from water intrusion, they include an internal waterproof stuff sack. Like most waterproof stuff sacks and packs, it features a bleed valve to release trapped air to help compress it down to the smallest size, which makes it easier to inserts into the main bag. After filling the stuff sack, rollover its top closure several times for an airtight seal, and burp the air out to minimize the size.
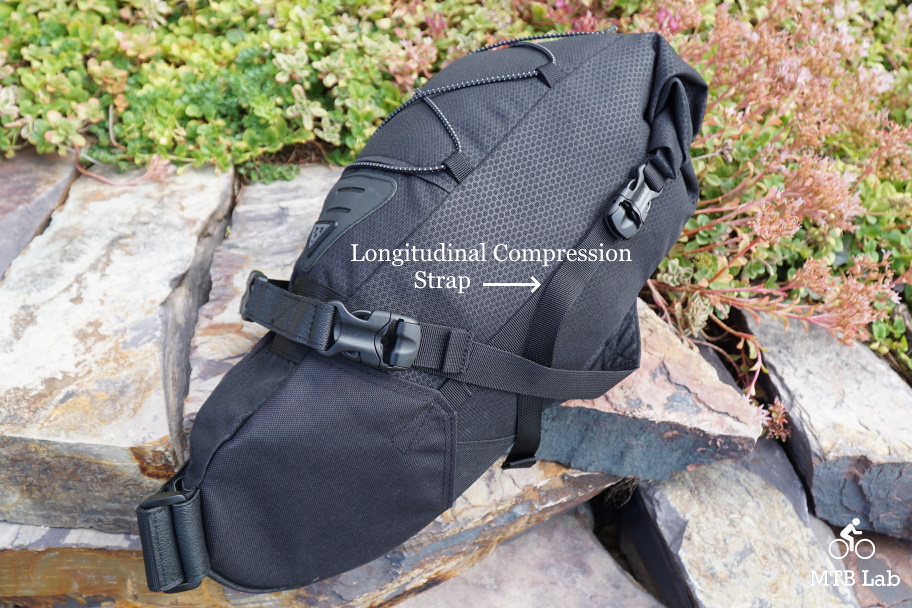
Once the stuff sack is packed, place it into the main body, and roll over the mains top closure at least three times and snap its buckles into the unlocked long-axis side compressions straps.
The odd thing is that the stuff sack is shaped like a long cylinder while the main bag is a cross between a cone and a tall pyramid, with the tops cut off. The two entities don’t quite jive perfectly with each other, so you have to smoosh the stuff sack into the pack by hand and then pull the long axis compression straps down extra tight. I tended to manually shove small items into the nooks and crannies to use up any excess free space. You may need to readjust the number of rollovers of the top closure, depending on how things end up working out.
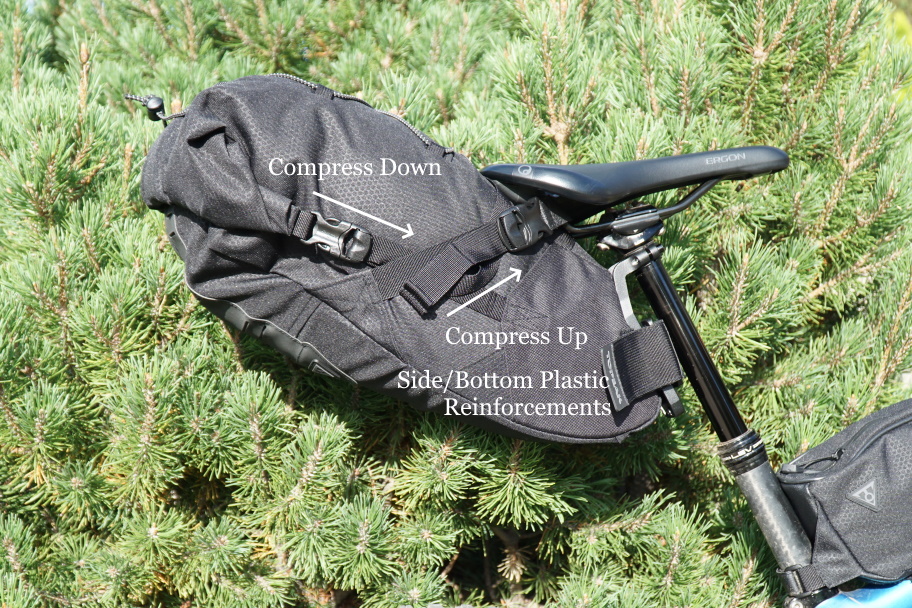
Finally, with all the buckles unlocked, pull downward on the side compression straps and saddle diaper, to help compress the contents down and around, and lift the pack upward. The pack has a bottom plastic plate along the bottom half and two short side sections under the saddle area, to help protect, stiffen and reinforce things. You’ll need to tighten or loosen the compression straps until the pack has the proper fit on the bike, not too snug, and not too sloppy. Once you’re done, snap down the QR buckle locks, and its time to ride.
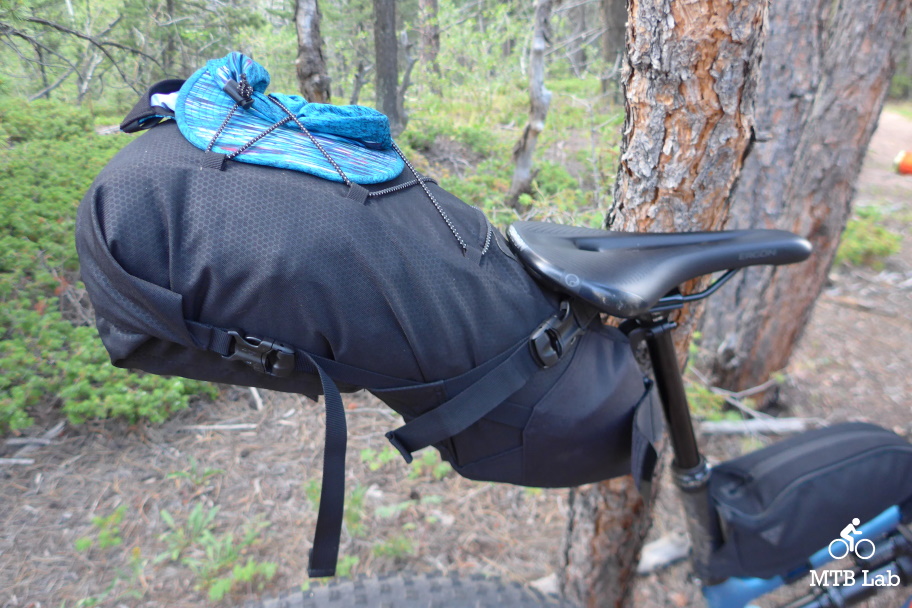
There is some additional space to tie on a hat or a small piece of apparel to the topmost bungee/elastic straps. I tended to carry a baseball cap there when I took breaks out on the trail. It has a strap ladder on the bottom rear of the pack, but I can’t imagine it would be very functional since it would pick up debris, dirt, and mud while riding, though it could be handy to attach a rear blinker light.
Impressions
It uses a single wide Velcro seatpost attachment strap for the front of the pack, along with two QR buckles to secure the top back to the saddle rails, and those buckles also connect up to the side compression cradle system. The seatpost strap is easy to use, but unfortunately, finessing the large buckles through the saddle rails was cumbersome sometimes, and a longer strap length or smaller buckles would likely solve the issue. Turning the pack sideways to route the buckles does simplify the task. Once attached, the side buckles were much easier to deal with, and adjusting the compression was simple.
I was able to stuff all my sleeping gear and apparel into the stuff sack without much hassle. The gear included an air mattress, down quilt, pillow, light puffy jacket, and extra clothes. Multiple re-burping of the stuff sack might be needed to squeeze things tightly down, and remove excess air. I’d usually shove some of the extra clothing into the open spaces left by the not quite perfect fit left between the stuff sack and the main bag. Even though I placed my down quilt into its compressible stuff sack, it was still the bulkiest item, and I would work my packing around it so that everything would fit the most efficiently. Once things are packed, vigorously shove the stuff sack into the main bag to utilize any free space, and roll the closure over several times and attach the closure buckles to the side straps.
Once I had things packed, you could play with the long side compression strap and cradle compression strap to get the pack balanced and centered, and snugged and smooshed inward. If you had to much weight in the pack or positioned it incorrectly, it could sometimes sway back and forth, which was a bit disconcerting while riding, especially on bumpy singletrack. For full suspension bikes, depending on how much you load the pack, your rear suspensions sag setting, and how high you have your saddle set, you can sometimes buzz the rear tire on the bottom of the pack. Fortunately, the pack’s material is robust, and it has a plastic stiffener along the rubbing section, both of which offered plenty of protection.
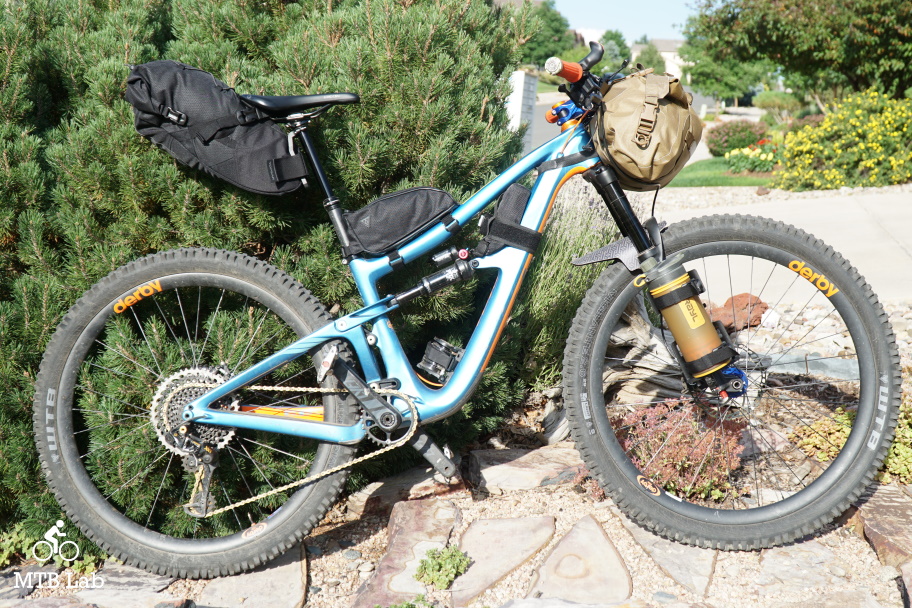
It has a streamlined design, and I never brushed up against it while riding. When it’s fully loaded, the tail end of the packs sticks above the saddle and getting on and off the bike it a bit more of a contortion movement when tossing your leg over things.
Bottom Line
The Topeak BackLoader is the perfect size for a short tour, and if teamed with a frame and handlebar pack, you’d be prepared for a more adventurous and more extended bikepacking expeditions. The pack is ideal to add capacity to full suspension bikes since there frame bag storage space is minimal. It’s simple and easy to attach to the seatpost and saddle, though finessing the buckles over the saddle rails can sometimes be cumbersome. It utilizes robust water-resistant materials, with an included a waterproof inner stuff sack, and the long axis and front compressions straps help trim the load.